

![图片[1]-Voron 蜘蛛主板(FYSETC SPIDER)配置安装Bltouch-RSG-人生观](https://www.lxg2016.com/wp-content/uploads/2021/03/1616474041-bc29f68a2d5aaf17.png)
前言:
之前一段时间,把我的voron2.4从双SKR1.3的配置方案换成了单蜘蛛主板!之后心痒痒弄了Bltouch,顺便写出来心痛的历史!
教程:
Bltouch和3D touch 两个东西外观基本一样,功能也一样如果没有特殊需求我建议大家去购买3d touch,BLtouch的价格略高,两者精度差不是特别大!
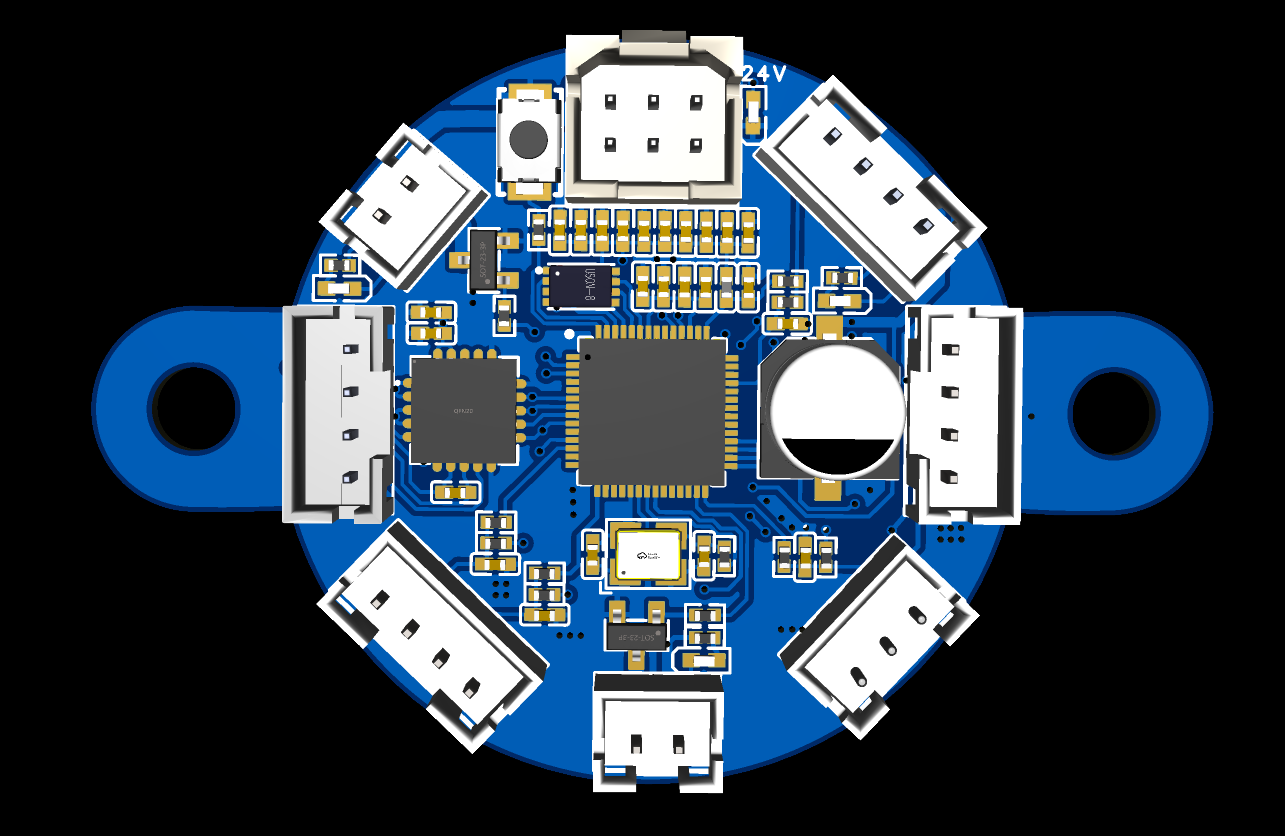
我这里蜘蛛主板是1.0的版本,蜘蛛还有另一个1.1的版本,本教程只是在1.0的基础上配置的,其他版本仅供参考!
![图片[2]-Voron 蜘蛛主板(FYSETC SPIDER)配置安装Bltouch-RSG-人生观](https://www.lxg2016.com/wp-content/uploads/2021/10/20211014130643766.png)
注意:这里有个天坑!官方给的pa0控制pa3传感器,是错误的!
- 在通电之前,请注意输入电压,bltouch的输入是5V的注意切换跳帽,蜘蛛主板默认是VIN 就是电源输入的电压
- 将官方错误截图在PA0上灰色的线接入PA3,即可 其他接线按照官方的图连接!
- 官方给的是PA0是控制信号PA3是传感器信号,无论按照我该接线后和前都是错误的,应该是PA2是控制信号,PA3是传感器
站长的bltouch配置:(仅供参考)
#####################################################################
# Bltouch
#####################################################################
[bltouch]
##  Bltouch - If you use this section , please comment the [probe] section
##  More infomation at : https://www.klipper3d.org/BLTouch.html
##  This bltouch is not used for Z height, only Quad Gantry Leveling
##  In Z+ Position
sensor_pin: PA3
##  In Y+ Position
control_pin: PA2
#probe_with_touch_mode: True
#pin_up_touch_mode_reports_triggered: False  ##False or True
x_offset: -38
y_offset: 0
#z_offset: 1.721
speed: 10.0
samples: 3
samples_result: median
sample_retract_dist: 3.0
samples_tolerance: 0.006
samples_tolerance_retries: 3
结尾:
接线的时候一定要在三检查,尤其是注意电压的跳帽,一定要5V 我在这里忘了跳输入就是24v,以炸掉一个bltouch(200快)的代价,才有了这个教程/(ㄒoㄒ)/~~
© 版权声明
文章版权归作者所有,未经允许请勿转载。
THE END


暂无评论内容